Mastering Exocad: From Beginner to Digital Dentistry Pro
In the era of digital dentistry, Exocad has become the global gold standard for dental labs and clinics. Its versatility and power offer limitless possibilities, but mastering it requires a structured approach. Whether you are looking to enter the world of CAD/CAM or upgrade your lab’s capabilities, this guide provides a comprehensive roadmap to success.
Why Exocad? The Industry Standard
Before diving into the “how,” it is essential to understand why Exocad is preferred by professionals:
-
Open System: It supports all 3D scanners and file formats (STL, PLY, OBJ).
-
Modularity: You can start with the basics and add modules like Implant Creator, Smile Design, or PartialCAD as you grow.
-
Precision: It offers unmatched control over clinical parameters, ensuring a perfect fit every time.
FOR Exocad ..Hardware & Preparation
To run Exocad smoothly, your hardware must meet specific demands. A lagging computer is the biggest enemy of a digital designer.
-
Processor (CPU): Intel Core i7/i9 (12th Gen+) or AMD Ryzen 7/9.
-
Graphics (GPU): Nvidia RTX 3060 or higher (8GB VRAM recommended).
-
RAM: Minimum 16GB (32GB is the “sweet spot” for complex cases like All-on-4).
-
Input Device: A high-precision mouse is mandatory; many pros also use a 3Dconnexion SpaceMouse for 3D navigation.
The Learning Roadmap
Phase 1: The Fundamentals (Crown & Bridge)
Your journey starts with the “Wizard” mode. You must master:
-
Margin Line Detection: Learning when to trust the auto-detection and when to manually refine boundaries.
-
Cement Gap & Parameters: Understanding the math behind the fit (20-40 microns is typical, but varies by material).
-
Virtual Articulator: Adjusting dynamic occlusion to prevent “high spots” in the final restoration.
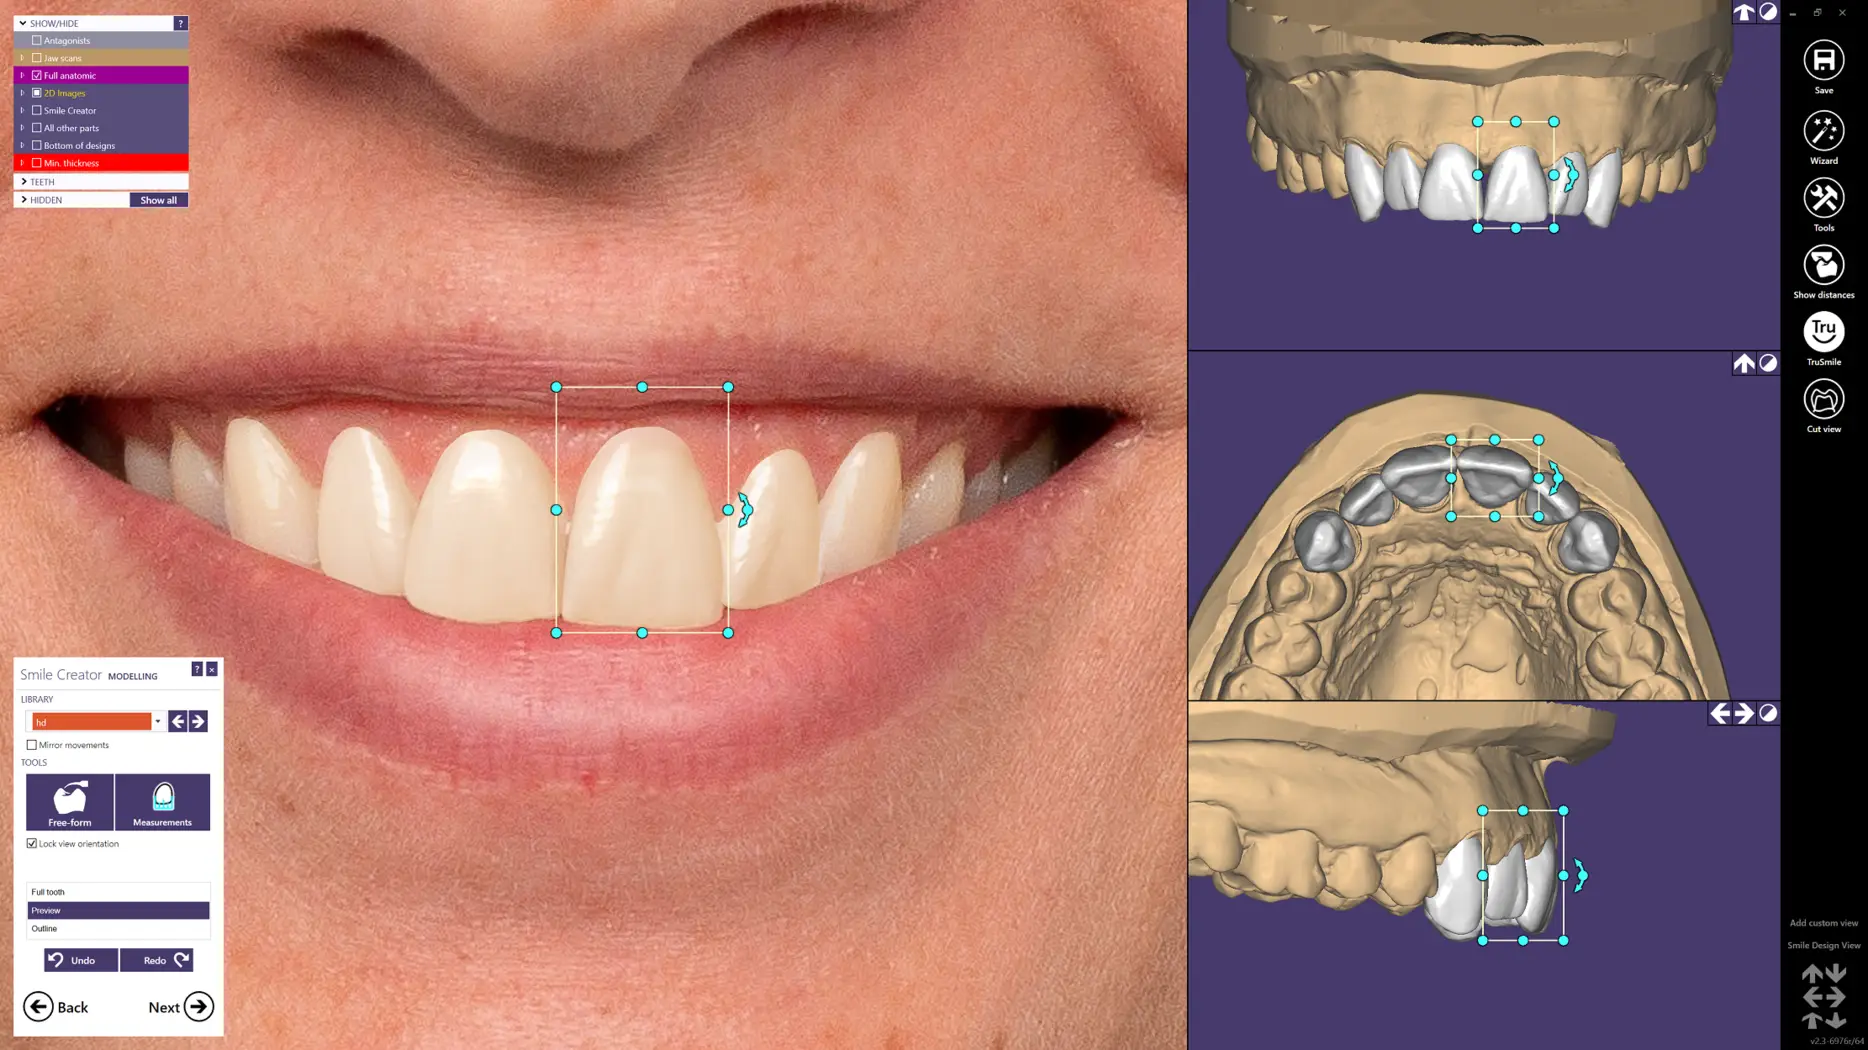
Phase 2: Aesthetic Design in Exocad (Veneers & Smile Design)
-
Exocad Smile Design: Integrating 2D patient photos with 3D models to create a “Trial Smile.”
-
Mirroring & Symmetry: Using the software to copy the anatomy of a natural tooth to its contralateral counterpart.
Phase 3: Advanced Implantology
-
Custom Abutments in exocad : Designing patient-specific abutments with optimal emergence profiles.
-
Surgical Guides: Combining CBCT (DICOM) data with intraoral scans (STL$) to plan precise implant placement.
Troubleshooting Common Issues
Even experts encounter glitches. Here is how to handle the most common ones:
| Issue | Solution |
| Holes in the Mesh | Use the “Close Holes” tool in Expert Mode. Re-scan if the hole is on a critical margin. |
| Alignment Failures | Ensure you select at least 3 distinct, widely spaced points on both the scan and the CT data. |
| Insertion Axis Errors | If the undercut is too deep, use the “Set View Direction” tool to find the optimal path of insertion. |
| Software Lag | Hide unnecessary layers (like the antagonist or 2D images) to free up GPU memory. |
Pro Tips for Faster Workflow
-
Master the Hotkeys for Exocad : Use
Sfor Smooth,Afor Add/Remove, andCtrl+Zreligiously. -
Custom Libraries in Exocad software : Don’t settle for the default tooth shapes. Import high-quality libraries (like Zirkonzahn or Anatomic) to give your work a natural look.
-
Expert Mode: Don’t be afraid to leave the “Wizard.” Expert mode allows you to jump between steps without losing progress.
Mastering Exocad is an investment in your professional future. It transforms you from a technician into a digital artist. The key is consistent practice and learning from the right sources.
Ready to start your digital journey? Explore our [Advanced Exocad Training Courses] and get hands-on experience with real-world clinical cases.